Mechanical Keyboard Build Essentials Checklist — Your Complete Guide
Build your own custom mechanical keyboard from scratch with premium components. Your complete essentials checklist — find out exactly what you need to buy and what can wait.
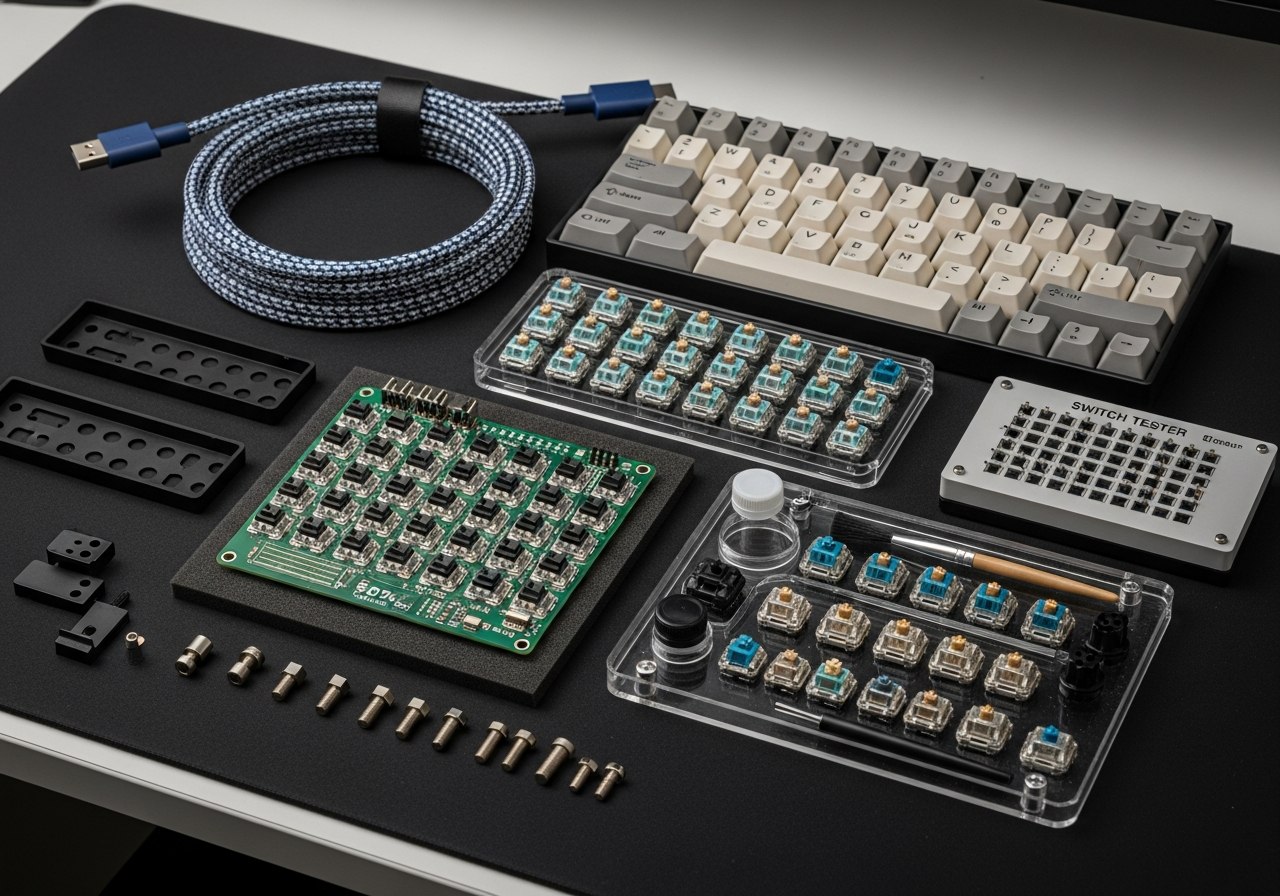
Building a custom mechanical keyboard is the ultimate way to get a typing experience tailored exactly to your preferences. This kit covers everything from the PCB and case to switches, keycaps, and the tools you need to assemble, lube, and tune your dream board. Whether you want a thocky deep sound or a clicky tactile feel, it starts here.
These are the core items required to get started. Do not skip these.
Switch Puller & Keycap Puller — $6 - $15 Essential tools for removing switches and keycaps without damage.
Switch Lube Station — $10 - $25 Organized workstation that holds switches open during the lubing process.
Keycap Set — $25 - $80 PBT or ABS keycap set in your preferred profile and color scheme.
Stabilizer Set — $10 - $25 Screw-in or plate-mount stabilizers for spacebar, shift, and enter keys.
Hot-Swap PCB Board — $30 - $60 Programmable PCB with hot-swap sockets so you can swap switches without soldering.
Keyboard Case — $25 - $100 CNC aluminum or high-quality plastic case that houses the PCB and plate.
Plate (Aluminum or PC) — $15 - $35 Mounting plate that sits between the PCB and switches for structure and sound.
Nice to Have (3)
These optional items improve convenience, presentation, or overall experience.
Switch Tester — $10 - $25 Sample board with various switch types to test feel and sound before committing.
Coiled USB-C Cable — $20 - $50 Premium coiled cable with aviator connector for a clean look.
Case Dampening Foam — $5 - $15 Sound-dampening foam layers for the case and between PCB and plate.
Building Your First Custom Mechanical Keyboard
The custom mechanical keyboard hobby has exploded in popularity, and for good reason. A well-built custom board sounds better, feels better, and looks better than any mass-produced keyboard. Plus, building one is deeply satisfying — like assembling a precision instrument.
Understanding the Components
**PCB (Printed Circuit Board)** — The brain that registers your keystrokes
**Case** — The housing that holds everything together (aluminum, plastic, or wood)
**Plate** — Metal or polycarbonate layer between the PCB and switches for rigidity
**Switches** — The mechanism under each key (linear, tactile, or clicky)
**Keycaps** — The visible tops you press (PBT or ABS plastic)
**Stabilizers** — Support mechanisms for larger keys like spacebar and shift
Choosing Your Switches
**Linear** (e.g., Cherry MX Red, Gateron Yellow) — Smooth with no bump, great for gaming
**Clicky** (e.g., Cherry MX Blue, Kailh Box White) — Audible click with each press
The Lubing Process
Lubing your switches is the single biggest upgrade for sound and feel. Apply thin lubricant (Krytox 205g0 for linears, Tribosys 3203 for tactiles) to the stem, spring, and housing of each switch. It takes time — budget 2-3 hours for a full board — but the result is transformative.
Tips for First-Time Builders
Start with a hot-swap PCB so you can change switches without soldering
Use a switch tester before buying 70+ switches — try before you commit
Watch build videos to understand the assembly process before starting
Clip, lube, and band-aid mod your stabilizers — rattly stabs ruin an otherwise great board
Budget for the keycaps you actually want — they make the biggest visual difference
Common Mistakes to Avoid
Forgetting stabilizers — your spacebar will rattle horribly without proper stabs
Over-lubing switches — too much lube makes keys feel mushy and sluggish
Buying the wrong switch count — count your layout keys and add 5-10 extras
Skipping dampening foam — it dramatically improves the sound profile
Frequently Asked Questions
What's included in the Mechanical Keyboard Build Kit bundle?
This bundle includes 10 carefully selected items organized by priority: 7 must-have essentials, 3 nice-to-have upgrades, and 0 down-the-road additions.
How much does the Mechanical Keyboard Build Kit cost?
The estimated total for this bundle is $100 - $350. You can buy individual items based on your budget and priorities.
Can I buy individual items instead of the full bundle?
Yes! Each item links directly to Amazon where you can purchase individually. Start with the must-have items and add nice-to-haves over time.
How are products selected for this bundle?
We research customer reviews, expert opinions, and real-world performance data to select the best products at various price points for each item category.
As an Amazon Associate, BundleMatchly earns from qualifying purchases. Prices are approximate and may change.